I have reorganized my desk more times than I can count. I would spend twenty minutes on a Sunday getting everything exactly right, and by Wednesday it looked like a shipping depot. Cable piles, random charging bricks, a coffee mug in three different spots depending on my mood. The desk was not the problem. The surface was. Without a defined anchor point, nothing has a permanent home. Every item migrates every day.
The fix that actually stuck for me was not a new organizer bin or a label maker. It was laying down the Aothia leather desk pad first, then building the rest of the organization system on top of it. Once the surface had a clear boundary and a consistent feel underfoot, every item found its zone and stayed there. This guide walks through exactly how to do that in five steps.
Your desk surface is the foundation. Get this right first and everything else follows.
The Aothia leather desk pad has 77,000 Amazon ratings and a non-slip backing that holds its position even on smooth laminate. It is the starting point for every step in this guide.
Amazon Check Today's Price on Amazon →Step 1: Clear Everything Off the Desk Completely
Do not try to organize around the clutter. Take everything off the desk surface and put it on the floor or a nearby table. Every cable, every piece of gear, every random item that has been sitting there for three weeks. This step is uncomfortable because it looks worse before it looks better, and most people skip it. They rearrange instead of reset. Rearranging does not work because it keeps all the same accumulation patterns in place.
While the desk is empty, wipe down the surface. Pay attention to scratches, sticky patches, and how rough or smooth the material feels under your hand. If your desk has a cheap laminate top, you will notice immediately that your mouse drags and your keyboard sits at a slight angle from wear. That matters for the next step.
This is also the moment to make a decision about what belongs on your desk at all. The standard answer from productivity writers is 'only what you use every day.' That is the right answer, but the more useful version is this: anything that does not have a specific place it returns to after use should not be on the desk in the first place. If you cannot name where it goes, it is clutter waiting to happen.

Step 2: Lay Down the Desk Pad Before Anything Goes Back
The Aothia desk pad goes down on the empty surface before you return a single item. This order matters. If you put gear back first and then try to slide a desk pad underneath, it never sits flat and the edges bunch up at the back. Lay the pad first, smooth it from the center outward toward the edges, and let the non-slip backing grip the desk surface for a few seconds before adding anything on top.
The Aothia pad comes in two sizes. The standard is 31.5 by 15.7 inches, which covers the keyboard and mouse zone plus a writing area. The large version runs 35.4 by 17.3 inches, which works better if you have a monitor arm and want the pad to extend from one side of the desk to the other. For a typical 48 to 60-inch desk, the large size is the one to get. It creates a single unified work surface that makes the desk look intentional rather than assembled from random pieces.
The PU leather surface has two practical benefits beyond aesthetics. First, it is waterproof, so coffee spills wipe clean without soaking into the desk below or warping the surface. Second, the uniform texture means your mouse tracks consistently across the entire pad without the performance drop you get at the edge of a traditional mousepad. You are not switching surface types as you move your hand. That small consistency reduces friction in the literal sense and in the workflow sense.
Once the surface had a clear boundary, every item found its zone and stayed there. The pad is not decoration. It is the organizational system.
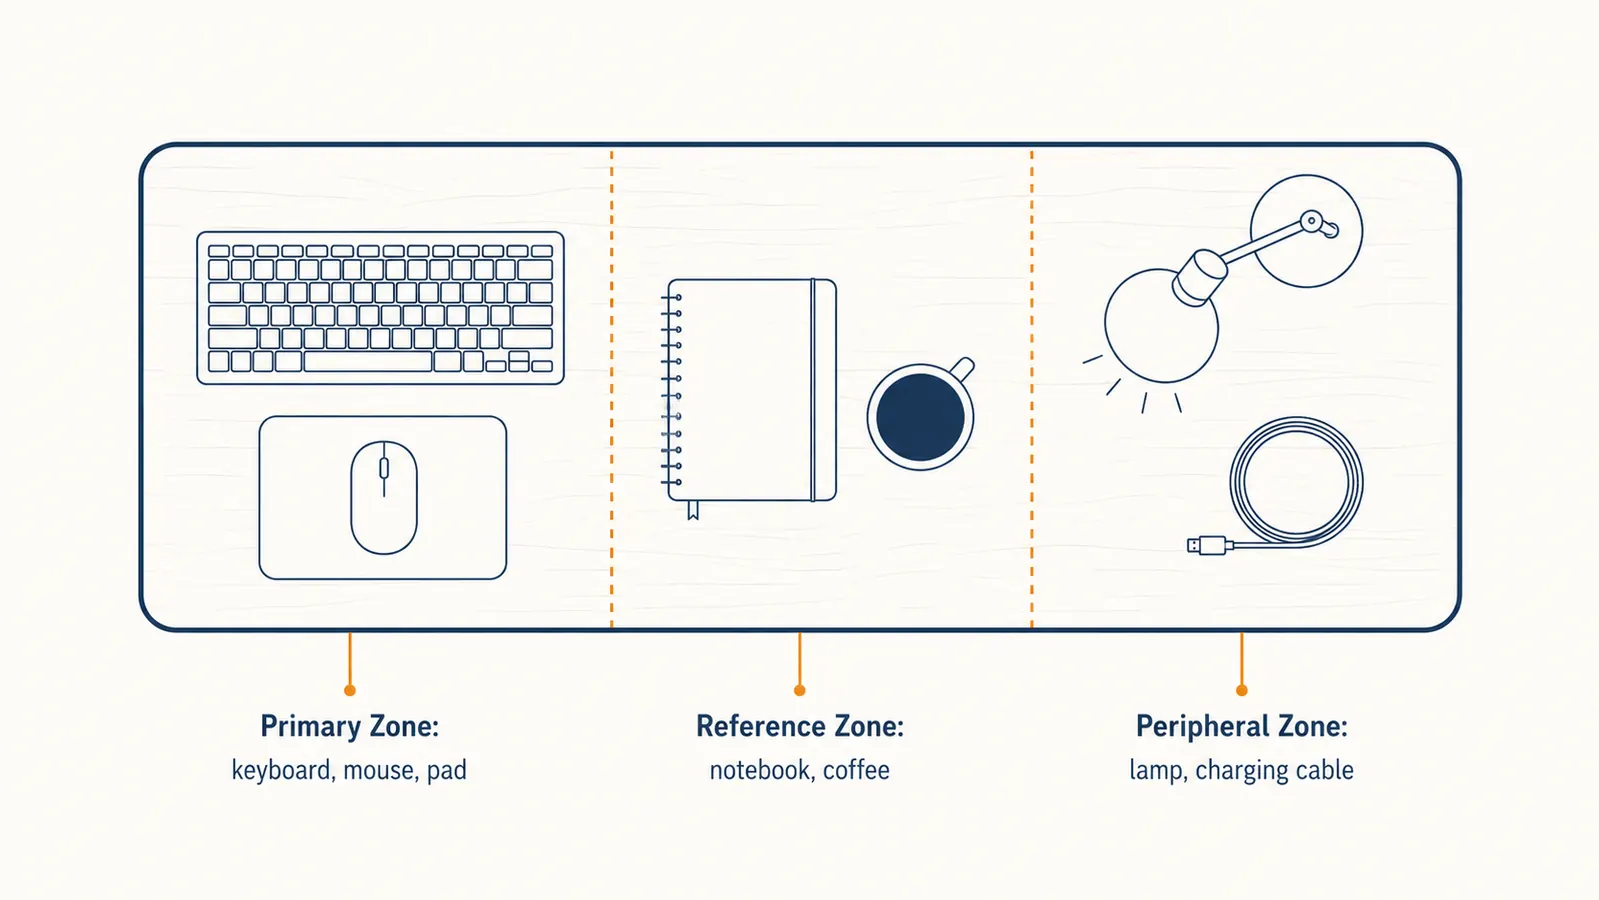
Step 3: Define Three Zones Before You Place Anything
Most desk organization fails because people think about individual items instead of zones. They decide where the stapler goes without deciding what region of the desk the stapler belongs to. Then the stapler migrates because the region was never enforced. Zones fix this.
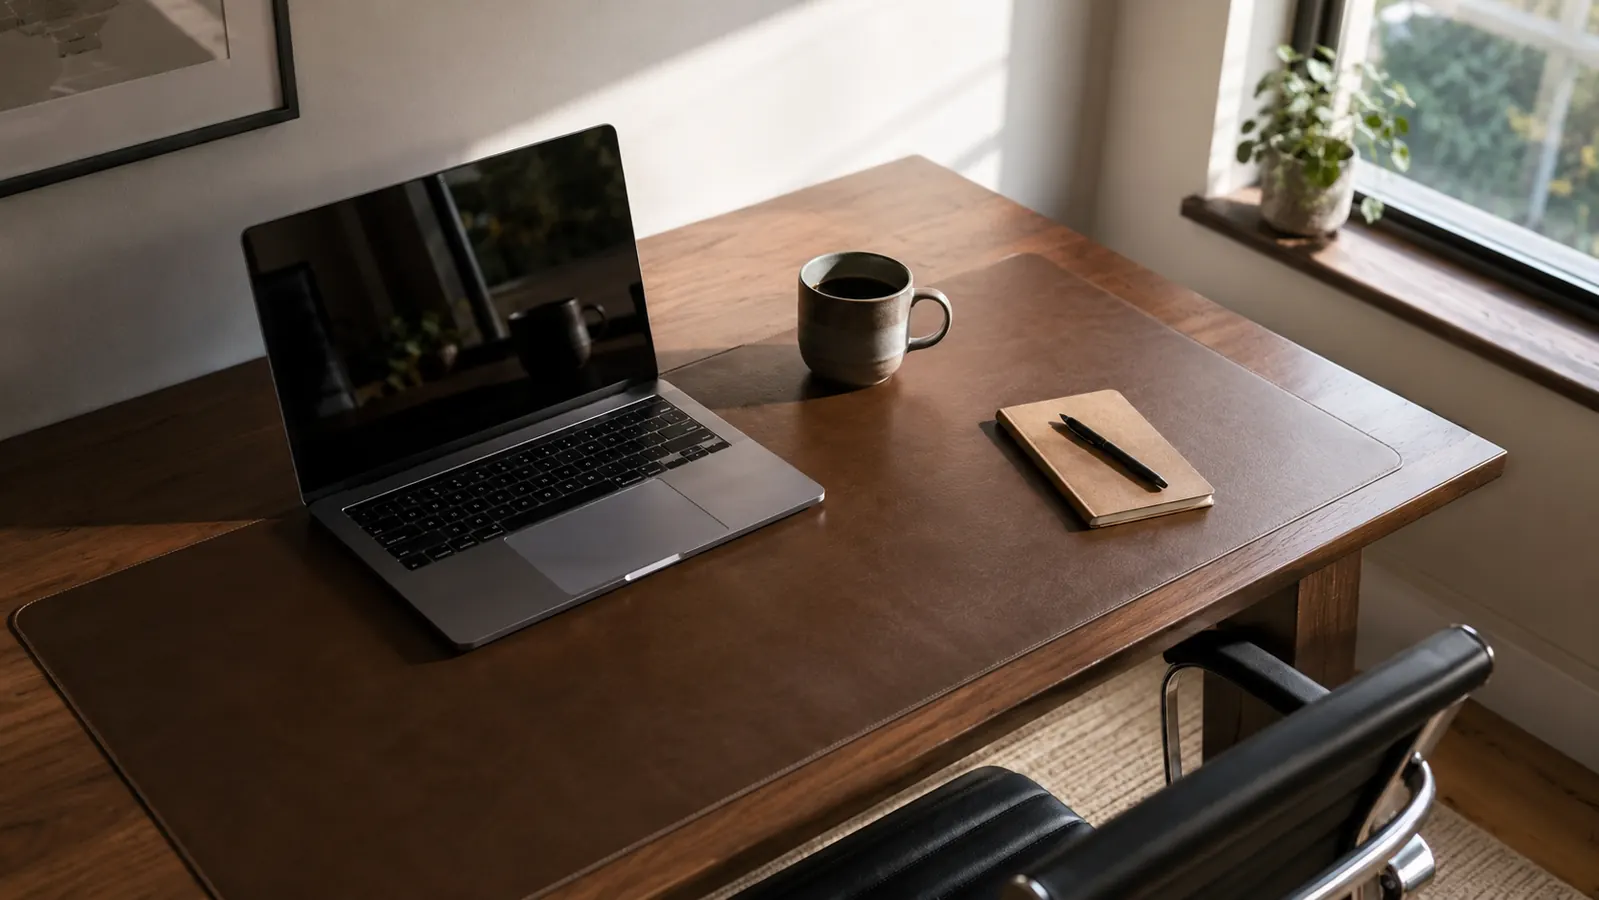
With your desk pad laid flat, mentally divide the surface into three horizontal bands. The primary zone is the center strip directly in front of your chair. This is where your keyboard and mouse live, and nothing else. The keyboard goes to the left of center, the mouse to the right, both sitting on the desk pad surface. Nothing else enters this zone during a work session. Not your phone, not your notebook, not your coffee mug.
The reference zone is the far edge of the desk pad closest to the monitor. This is where a small notepad and a single pen go. One pen. If you need more than one pen at the desk, you have a supply problem, not an organization problem. Keep a cup of pens in a drawer and bring one to the desk when the current one runs out. The reference zone is also where your coffee mug lives, set on a small coaster to protect the pad surface. When you stand up, the mug goes back to the reference zone.
The peripheral zone is everything off the pad entirely: lamp, speaker if you use one, cable pass-through, charging station. These items do not move. They sit in the same physical location on the actual desk surface, outside the pad boundary. The pad creates a visual separation between the active work area and the support items. That visual separation is what makes the desk look organized even when you are mid-project.
Step 4: Manage Cables Before Returning Any Gear
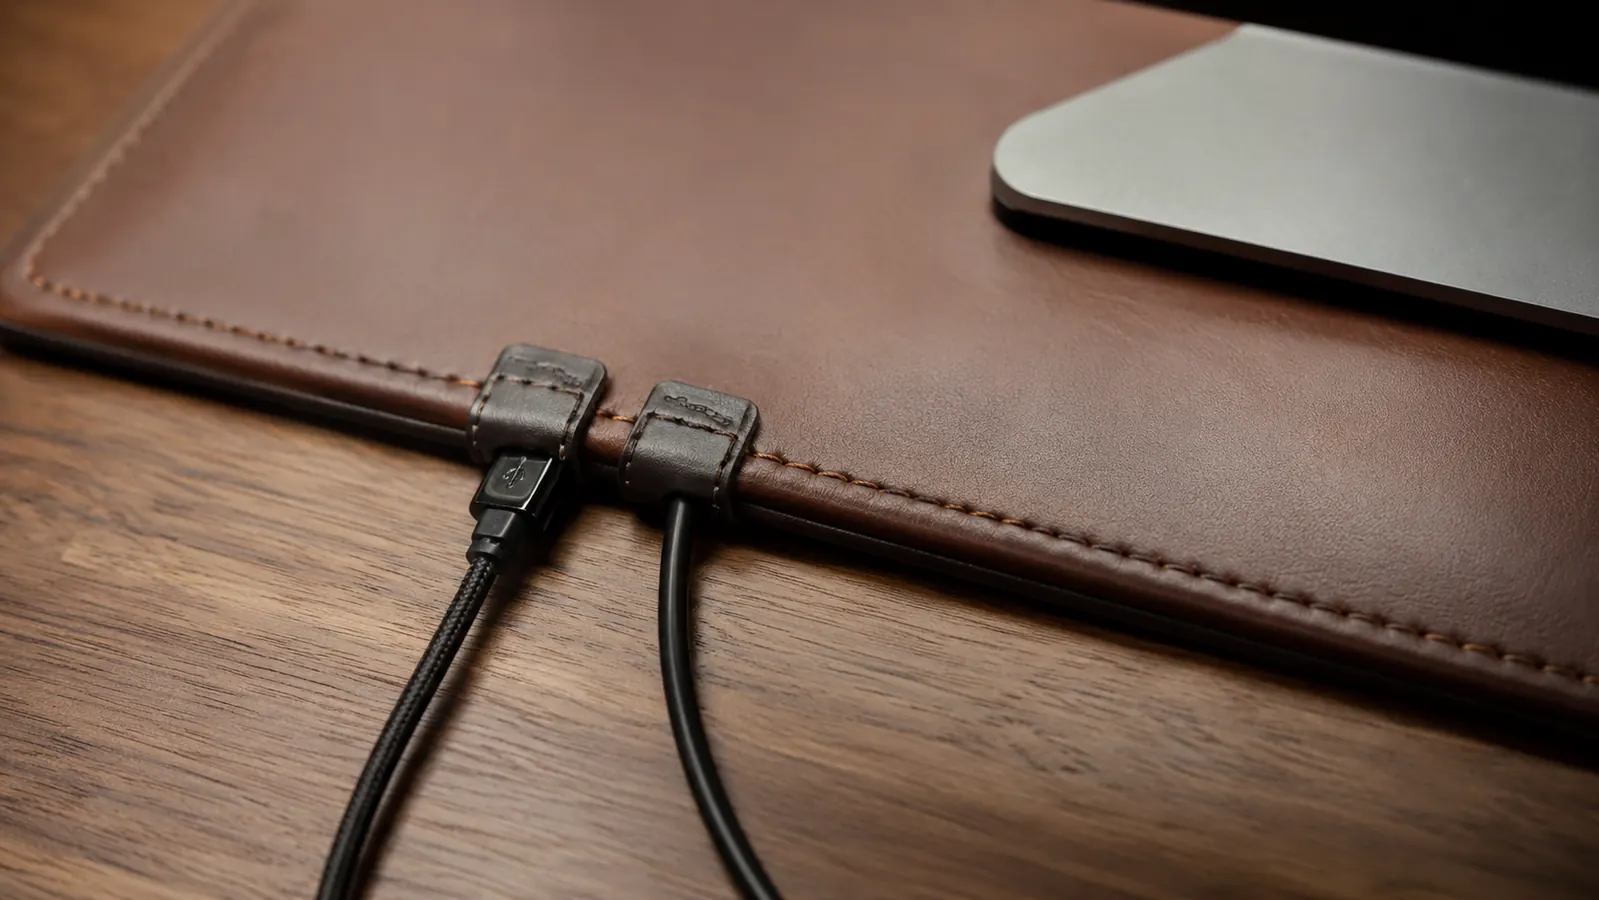
Cables are the fastest way to undo a clean desk. The typical remote worker has a monitor cable, a USB hub cable, a laptop charger, a keyboard cable if it is wired, and at least one phone charging cable. Left loose, those five cables become a pile within two days. The solution is not more cable ties. It is routing cables so they travel along the back edge of the desk pad and disappear over the back of the desk, not across the surface.
The Aothia pad's smooth surface and consistent thickness make this easy. Cables that run along the back edge of the pad lay flat and stay put. Use two or three small adhesive cable clips mounted to the back wall of your desk or along the rear lip. Route every cable backward, not sideways. The only cable visible on the desk surface should be the one actively connecting to whatever you are using right now. Everything else routes behind and down.
If your desk does not have a rear lip for cable clips, use a small adhesive cable raceway strip along the back edge of the pad itself. A few of those will run you under five dollars and solve the problem permanently. The key principle: cables should never cross the primary zone. If a cable crosses from the right side of the desk to the left in front of your keyboard, re-route it before returning any gear to the surface.

Step 5: Return Gear in Zone Order and Nothing Else
Now you return items to the desk in a specific order. Keyboard first, in the primary zone. Mouse second, on the desk pad to the right of the keyboard with enough clearance for a full arm sweep. Monitor last, positioned so the top of the screen is at or slightly below eye level. If your monitor sits on its stand on the desk surface outside the pad, that is fine. If you have a monitor arm, the arm frees the entire pad surface for actual work.
Then the reference zone: one notepad, one pen, coffee coaster. Then stop. Do not add anything else to the desk surface until you have genuinely decided it earns a permanent spot. The test is simple: does it have a specific zone it belongs to, and does it come back to that zone every time you use it? If not, it lives in a drawer.
What goes back into the pile on the floor? Everything you pulled off that does not meet the standard. Tape dispensers, stapler, extra pens, chargers for devices you do not use every day, the random USB drive, the small speaker you turn on twice a week. All of it goes in a drawer or off the desk entirely. A useful rule of thumb: if you can go from Monday to Friday without needing it at the desk, it does not belong on the desk.
What Else Helps
Once the desk is set up this way, a few additional habits keep it from reverting. The biggest one is a one-minute end-of-day reset. Before you close your laptop, return every item to its zone. Put the pen back on the notepad, move the coffee mug to the kitchen, tuck the phone charger back behind the pad. Sixty seconds every evening means you start the next morning with a clean surface. Skipping this even twice is how clutter comes back permanently.
The other thing that helps is treating the desk pad itself as a visual signal. When the pad surface is visible, the desk is in order. When you cannot see the pad under a layer of stuff, you know the system has slipped. The pad is not just a surface protector. It is a real-time status indicator for your organization system. That makes it easier to notice drift before it becomes a full reset project.
If you want to read a full breakdown of how the Aothia pad holds up over time, including how the PU leather wears at the edges after a year of daily use, the long-term review covers it. And if you are weighing the Aothia against a more expensive option, the comparison with the Nordik leather mat walks through whether the price gap is justified for most remote workers.
The desk pad that makes this system work is under $15. Most remote workers have spent more on a single lunch.
The Aothia PU leather desk pad is waterproof, non-slip, and large enough to cover your full keyboard and mouse zone. It is the foundation for every step in this guide and the reason the system actually sticks.
Amazon Check Today's Price on Amazon →